


Proof of Work On Solana
A step-by-step guide for anyone to mine Ore on your device

Before we dive into the nitty-gritty, I want to be upfront: I'm not exactly a tech wizard. The content you're about to read was originally shared by Ape Master Dao on Twitter, but let's just say it needed a bit of decoding. After spending what felt like eons tinkering and unraveling it, I've reshaped it into something that's hopefully a lot easier to digest. So, with that said, let's jump in.
You've probably heard of Proof of Work (PoW), especially if you've dabbled in the world of cryptocurrencies like Bitcoin or Litecoin. It's essentially the backbone of how these blockchain systems operate, facilitating the validation of transactions and the creation of new blocks on the blockchain. But if you're scratching your head wondering what exactly PoW entails, don't worry – I've got your back.
In a PoW system, miners compete to solve complex mathematical puzzles, requiring significant computational power. The first miner to solve the puzzle is rewarded with newly minted cryptocurrency and the opportunity to add a new block to the blockchain. This process not only ensures the integrity of the network but also incentivizes miners to contribute their resources to the network's security.
Think of it as a digital puzzle-solving race, where miners expend energy (in the form of computing power) to validate transactions and maintain the integrity of the blockchain. The difficulty of the puzzles adjusts dynamically to ensure a consistent rate of block creation, making PoW-based blockchains secure and resistant to malicious attacks.
Now, let's delve into Solana. Think of it as the wild west of blockchains – it's where anything seems possible and innovation knows no bounds.
One notable example of Solana's versatility comes from the ingenious mind of Hardhat Chad, a prominent developer in the Solana community. He employed the PoW concept in the token launch for his project, Ore. And let me tell you, this launch is turning heads. It's being hailed as one of the fairest token distributions yet. Intrigued? You can read more about the launch here.
In the upcoming sections, I'll walk you through the process of mining and participating in this token launch right from the comfort of your own home, using your trusty Windows machine.
There are already options available for starting your mining journey. You can begin mining through your browser by simply visiting the website using any device. Additionally, if you're using a Mac, you can download the desktop client for now. More platforms will be rolled out later to accommodate a wider range of users.
First things first – let's talk requirements. Here's what you'll need to get started:
Rust Installer
Node.js
Code Editor
Solana Wallet
Step 1:
Firstly, acquire a Solana wallet. It's advisable to create a new one and transfer a minimum of 0.01 SOL to this wallet. I recommend using Phantom. Once this step is completed, it's crucial to export the private key and keep it readily accessible, as you will require it later in the guide. Always remember never to share your passphrases or keys with anyone, as they are sensitive and vital for securing your assets.
Step 2:
Next, you'll need to set up the Rust environment manually. Begin by downloading the Rust installer and proceed with the installation process.
Please note that the application package relies on Microsoft Visual Studio build tools. If you don't already have it installed, you'll be prompted to download and install it during the Rust installation process. Alternatively, you can acquire it manually from here and install it before proceeding with the Rust installation.
Once you've completed the Rust setup, it's time to launch the Windows Command Line Interface (CLI). You can do this by searching for "Command Prompt" in the Start menu and clicking on it. Then, use the command cargo --version to check your Rust installation. If it displays the version information as shown below, you're good to go.

Step 3:
Now, it's time to install Node.js. Head over to the website and download the Node.js installer. Once the download is complete, proceed with the installation process.
After installing Node.js, you can verify the installation by typing node --version. This command will display the Node.js version installed on your system. If everything is set up correctly, you should see the version number displayed as in the image below.

Step 4:
Next, you'll want to obtain the official Ore source code. You can find it at Github. Download the source code by clicking on the "Code" button and selecting "Download ZIP". Once the download is complete, extract the contents of the ZIP file onto your desktop.
Alternatively, if you're comfortable using the command line interface, you can navigate to your preferred installation directory. For example, in this guide, we'll use the downloads folder. In the command prompt, navigate to your downloads directory by typing cd Downloads.

Once you're in the desired directory, clone the Ore repository by running the command git clone https://github.com/HardhatChad/ore-cli.git. This will create a local copy of the Ore source code on your machine. You should see a message like the one below indicating that the repository has been cloned successfully.

Step 5:
Now, let's navigate into the Ore CLI directory using the command line.
Type cd .\ore-cli\ to change into the Ore CLI directory.

Once you're inside the Ore CLI directory, it's time to compile the program. Run the command cargo build --release to initiate the compilation process.
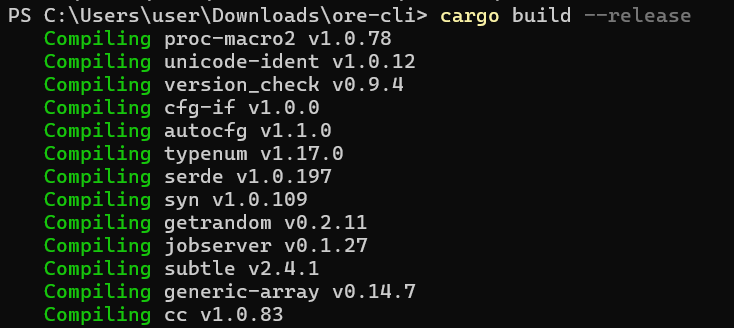
Please be aware that this process may take some time depending on your system's specifications. You'll see various messages and progress indicators during the compilation process. Allow it to run until completion.

Step 6:
After the completion of the previous step, you'll need to navigate to the directory where your newly compiled program is located.
To do this, type cd .\target\release\ in the command prompt. This command will take you to the specified directory where the compiled program is stored.

Step 7:
Now, let's locate the directory where the compiled version of ore-cli is stored using your file explorer. Typically, this would be located at a path similar to C:\Users\user\Downloads\ore-cli\target\release, but please adjust accordingly based on your specific setup.
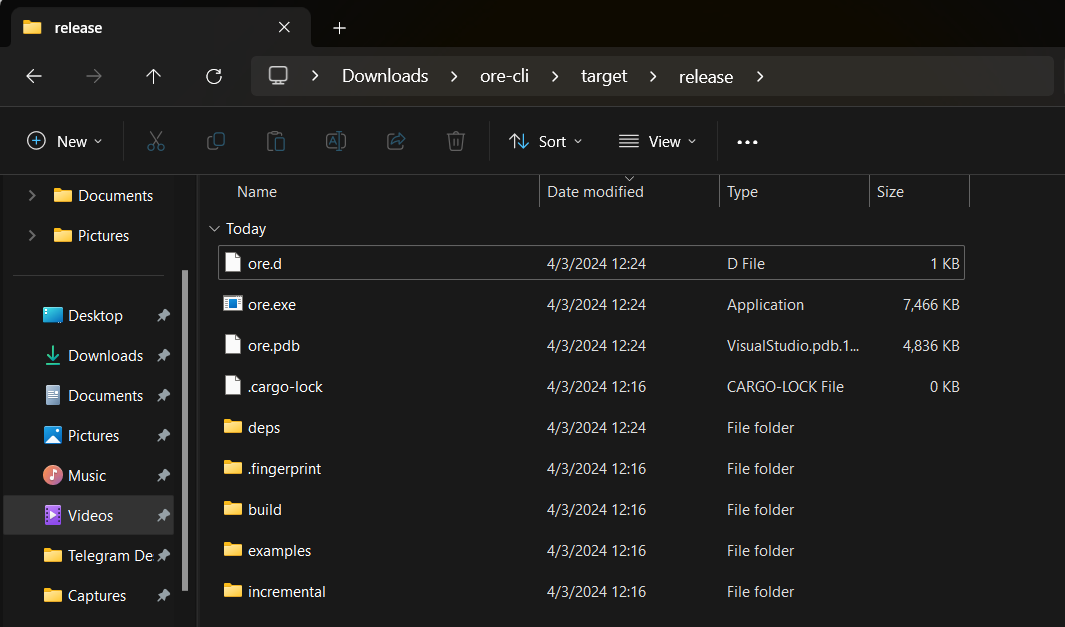
Once you've located the directory, open it. Within this directory, create two new files named generateKeypair.js and keypair.json, respectively. These files will be essential for the next steps in the process.

Step 8:
To proceed with this step, you'll need a code editor. Personally, I prefer to use Visual Studio Code (VSCode). If you don't have it already, you can download it from here.
Once you have VSCode installed, open the generateKeypair.js file in the editor. You can do this by launching VSCode and then either dragging the file into the editor window or using the "File" > "Open File" option to navigate to the file location and open it.
Next, paste the following code snippet into the generateKeypair.js file:
const { Keypair } = require("@solana/web3.js");
const bs58 = require("bs58");

(async () => {
  const secretKeyBase58 = "your_private_key_here"; // Replace your_private_key_here with your actual private key
  const secretKeyBytes = bs58.decode(secretKeyBase58);
  const keypair = Keypair.fromSecretKey(secretKeyBytes);

  console.log("Public Key:", keypair.publicKey.toBase58());

  // If you need to work with the Uint8Array representation of the secret key:
  console.log("Secret Key (Uint8Array):", keypair.secretKey);
})();
In the code snippet provided, you'll notice a placeholder text your_private_key_here. Replace this placeholder text with your actual private key, which you exported in Step 1 of this guide. Ensure to input your private key between the double quotation marks.

Once you've replaced the placeholder text with your private key, save the file. We'll use this code later in the process to generate your keypair.
Step 9:
After saving the generateKeypair.js file with your updated private key, return to your command prompt window.
First, run the following command to install the necessary packages:
npm install @solana/web3.js bs58
This command will install the required dependencies for the code to function properly. It may take a few minutes to complete. Once the installation is finished, you'll see a message like the one below, indicating success.

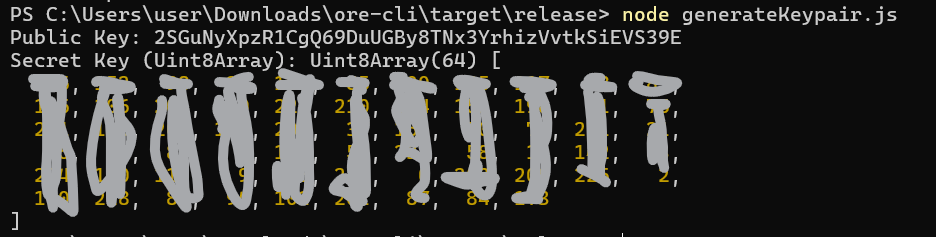
Next, execute the following command to generate your keypair:
node generateKeypair.js
Running this command will execute the JavaScript code in the generateKeypair.js file, generating your keypair. The output will consist of an array of numbers, which represents your keypair as seen in the image below.
Step 10:
Now that you've generated your keypair, it's time to save it for future use. Copy the keypair output that was displayed in your command prompt or terminal window.

Next, open the keypair.json file that you created in Step 7 using a text editor. Paste the copied keypair output into this file.
Ensure that the keypair output is properly formatted within the keypair.json file. Once you've pasted the keypair, save the file to preserve your keypair information for use in subsequent steps of the mining process.
Step 11:
Congratulations, you've successfully set up your mining environment! To commence mining, execute the following command in your command prompt or terminal:
.\ore --rpc https://linguistic-dulcea-fast-mainnet.helius-rpc.com --keypair keypair.json --priority-fee 1 mine --threads 8
Executing this command will initiate the mining process.

You'll observe output indicating the status of your miner. Be patient and allow the process to complete.

Please note that Solana's network may experience congestion at times, resulting in occasional failures. If you encounter any issues, simply rerun the command provided in this step to resume mining.
Step 12:
Occasionally, you may encounter errors like the one depicted below;

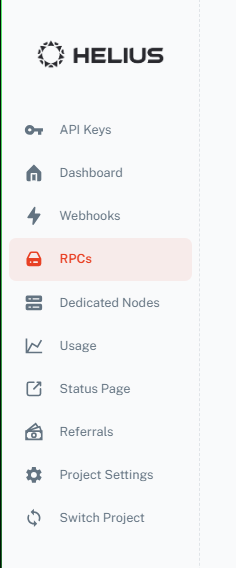
To rectify this, you'll need to utilize a custom RPC. For this guide, we'll utilize Helius. Begin by navigating to https://dev.helius.xyz and sign in using your preferred method. Here, I used my Phantom wallet and verified my identity via email. Once logged in, click on the "RPCs" menu.
On the RPC page, locate the desired RPC URL and copy it to your clipboard.

Next, navigate to your Ore installation directory. Open the src/main.rs file in Visual Studio Code (VSCode).


Within this file, locate the NETWORK_URL text. Under the default_value, replace the existing URL with the RPC link you copied from Helius.

Return to your command line interface and attempt to run the command again. This time, replace the URL in the rpc parameter with the copied URL from Helius.
Additionally, increase the priority-fee to 2 or your preferred value to expedite transactions. You can also adjust the number of threads from 8 to 16. While the exact function of this parameter is uncelar to me, I think its related to allocating your computer's memory resources for mining.
Here's the revised command:
.\ore --rpc YOUR_HELIUS_RPC --keypair keypair.json --priority-fee 2 mine --threads 16
Once you've made these adjustments, you should be all set to resume mining. Keep in mind that network issues may cause occasional failures. Simply rerun the commands as necessary to keep your miner operational.
Step 13:
To check your mined rewards, use the following command:
.\ore.exe --keypair keypair.json rewards
To claim your mined rewards, execute the following command:
.\ore.exe --keypair keypair.json claim
Extras:
If you find that your miner frequently stops due to network issues and you're tired of manually restarting it, you can utilize a Windows batch script created by Palinko to automate the process. Follow these steps to set it up:
Navigate to the directory where your
ore-cliis located, typically.\ore-cli\target\release\.Create a new file with the extension
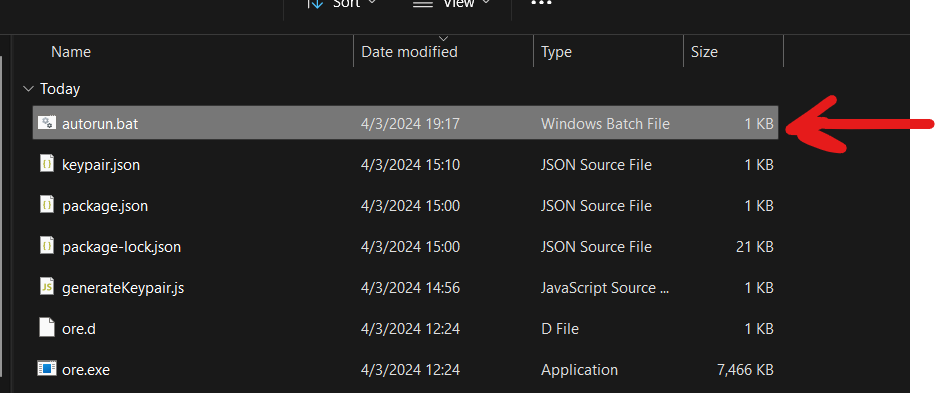
.bat. For example, you can name itautorun.bat.
Open the
.batfile in Visual Studio Code (VSCode) or any text editor of your choice.Paste the following code snippet into the file:
@echo off
echo Ore mining started...
:restart
ore --rpc RPC_URL --keypair keypair.json --priority-fee 1000 mine --threads 16
echo Ore miner restarts in 2 sec
timeout /t 2 /nobreak > nul
goto :restart
Replace
RPC_URLin the code with your custom RPC from Helius.Save the file.
To run your miner using this script, simply locate the autorun.bat file and double-click to launch it. This script will continuously run your miner, automatically restarting it whenever it stops, ensuring that your mining operations remain uninterrupted.
With this setup, you're all set to keep your miner running smoothly without the need for manual intervention.
And there you have it – you're all set.
If you've found this article enlightening and engaging, kindly express your support by liking and sharing it. Furthermore, should you come across any discrepancies or possess suggestions to enrich this discourse, we welcome your input in the comments section. Through collaborative efforts, we ensure the precision and relevance of the knowledge we share.
Connect with me on X: @angry__pacifist
Looks like it. The CLI has been updated since publishing this article, so in the main.src, don't change the original code, just paste your RPC url in the quotes where it says "Network address of your RPC url"
Hey there tried to go step by step but it keeps sayin:
Simulaton error: Error { request: Some(SimulateTransaction), kind: Reqwest(reqwest::Error { kind: Status(429), url: Url { scheme: "https", cannot_be_a_base: false, username: "", password: None, host: Some(Domain("mainnet.helius-rpc.com")), port: None, path: "/", query: Some("api-key=80526b01-b2ae-4f32-a7d0-2e79d745d1be"), fragment: None } }) }